

How to cope with small data and/or time consuming labellisation ? #2
Create oil out of nothing: Simulating data with 3D modelling !
“Data is the new oil”. This quote from the mathematician Clive Humby has gone around the world and is especially known from the Data community. And for a good reason : Data is now more than ever valuable. This much sought-after resource is the fuel that allows the biggest companies (i.e. the GAFAM*) to cruise in the economic world.
This article is the second part of our series on this subject, following an overview of the classical usages of data augmentation that you can find there: [https://www.quantmetry.com/data-augmentation-image/].
As data is often difficult to gather, why not create our own from nothing ? Here we will focus on methods for creating synthetic images from scratch, using Python libraries and 3D modeling.The purpose of this article is not to present in an exhaustive way all the cases that can be encountered, but to expose an approach that allowed Quantmetry to win an image detection hackathon. Hopefully it will be useful for your next Deep Learning project !
Key points
- 3D modelling is a great method to create photorealistic pictures with specific physical properties in a multitude of environments.
- Labels are known for these images because the generating method relies on user’s parameters to define the localization of objects.
- Even if the approach is quite hard to set up, it can be worthwhile as the quantity and quality of resulting images is virtually limitless.
- Recommended softwares:
- Blender [1]
- Onshape [2]
Simulating data: 3D modelling
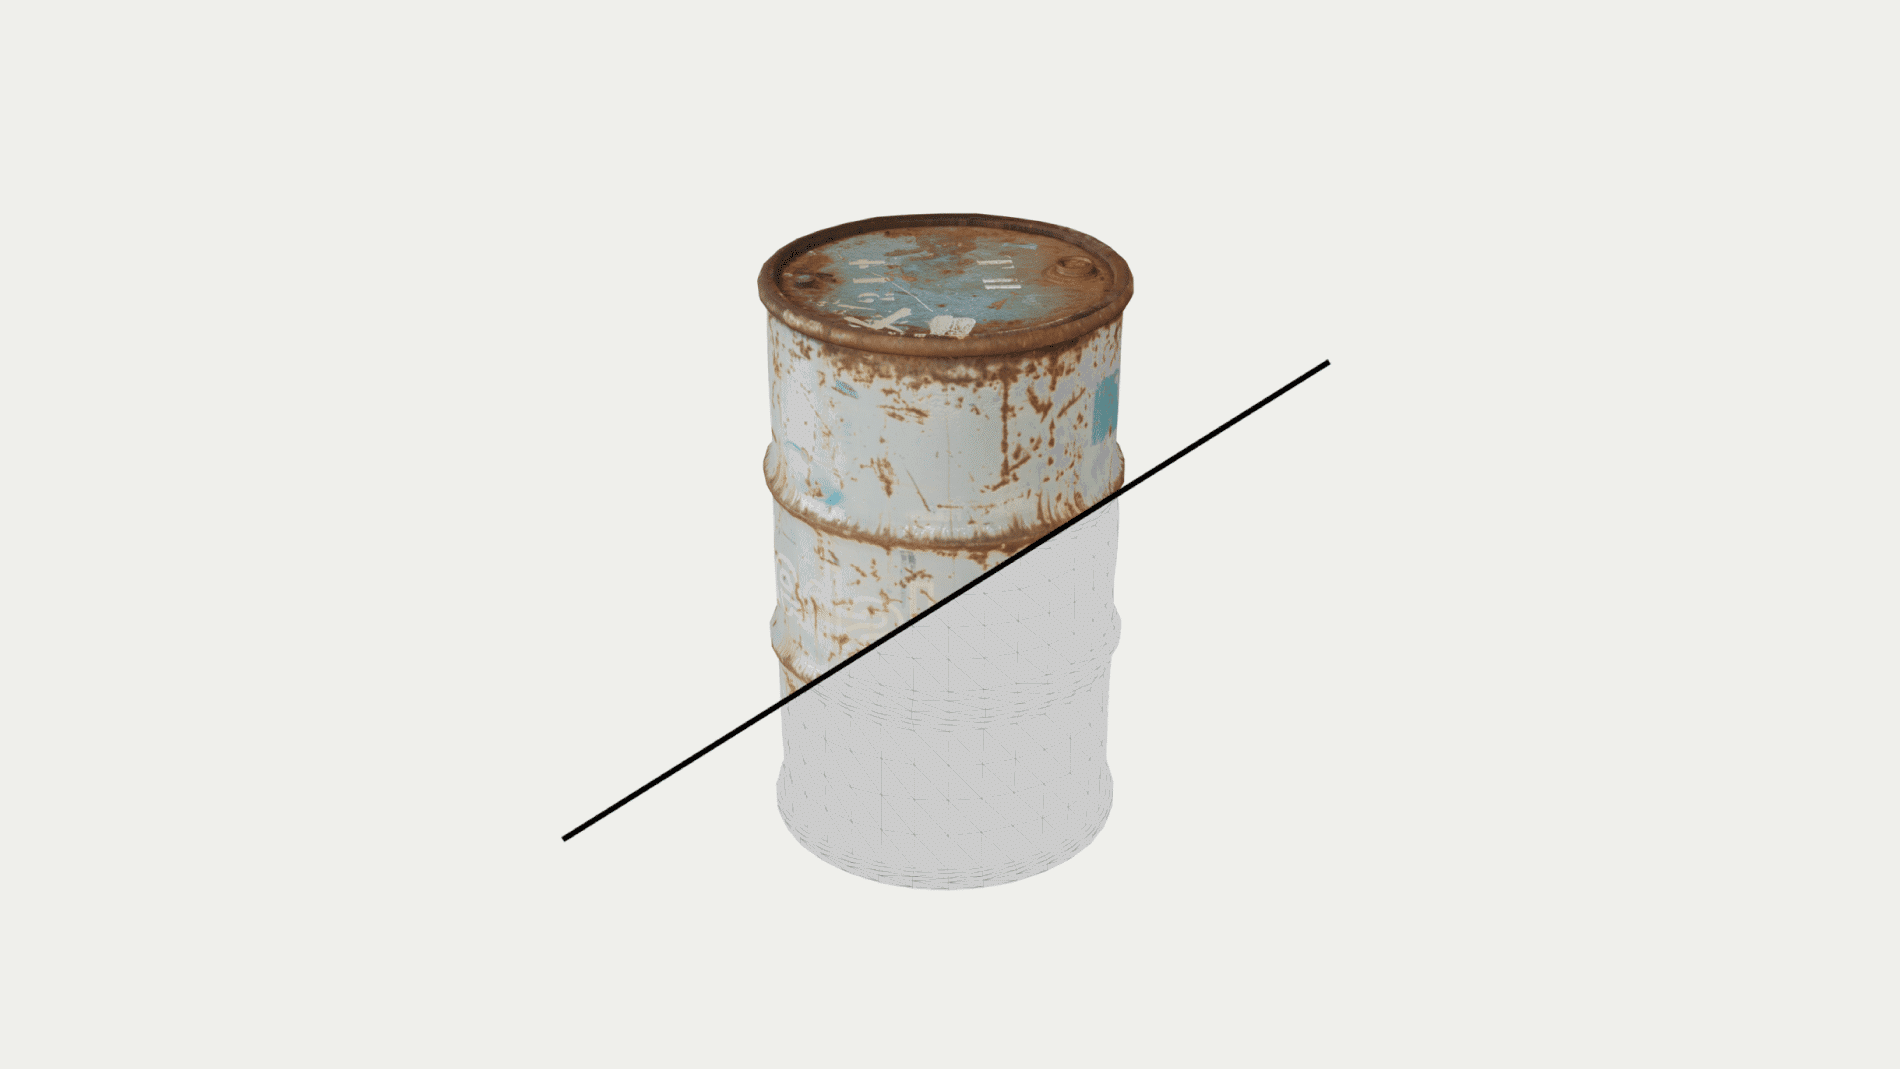
In a lot of cases, Deep Learning is used to localise an object or measure a quantity, based on an image of this object or scene. The geometrical properties of such target are key characteristics that differentiate it from surrounding elements. For instance an algorithm that is able to find cylinders should have an easy time localizing a cylindrical shape can on a table successfully.
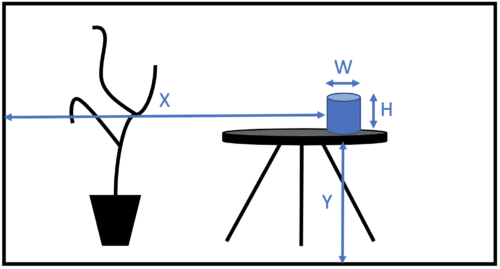
Evaluating X,Y,W and H is a localization problem. Determining W, H and the scale of the picture to evaluate the volume of the can would be a measure problem.
Moreover the geometry of each item can be restricted to a certain space of possibilities encoding its physical properties
In both cases, an efficient method to create new training images is to use 3D modelling. Once a 3D model of the object of matter is available, softwares of 3D modelling and animation like Blender [1] are really helpful tools to create renderings of different scenes. The main benefit of this method is that everything can be parameterized through the software meaning the localization and the volumes of the objects are known for every rendered image. Hence an arbitrary big number of accurate and exhaustive training samples are within reach without needing manual labelling.
Let’s have a look at a practical example in 3 steps:
Building a 3D model
The first step of the process is to create a 3D model of the object(s) of matter that we will use to create the rendering stage.
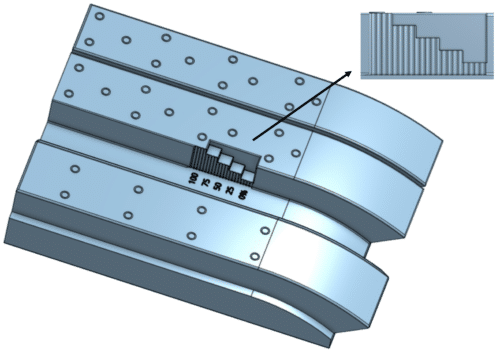
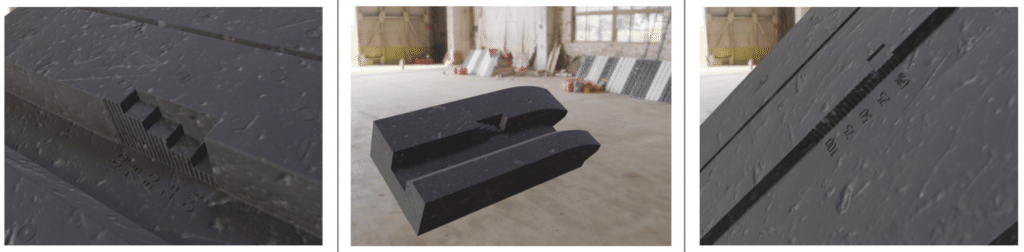
The goal here is to create the general geometry, all the other effects will then be added. A lot of softwares are available to do the CAD (Computer Assisted Design). For instance Onshape[2] allows to model quickly, directly in the web browser. A workaround the 3D modelling part is to find an already existing model on the internet (the most common objects can easily be found thanks to websites containing huge 3D collections). The example shown was created using Onshape. In this particular case, the goal of the Deep Learning model is to evaluate the position of the stair-like gauge in the image. As a consequence, the gauge was designed, as well as its surrounding on the real objects. This geometry is quite realistic and can be seen as a model of the general case that is encountered in genuine images.
Once the modelling part is done, we have to add effects like texture and lights. This will make the rendered images closer to reality.
Composition and effects
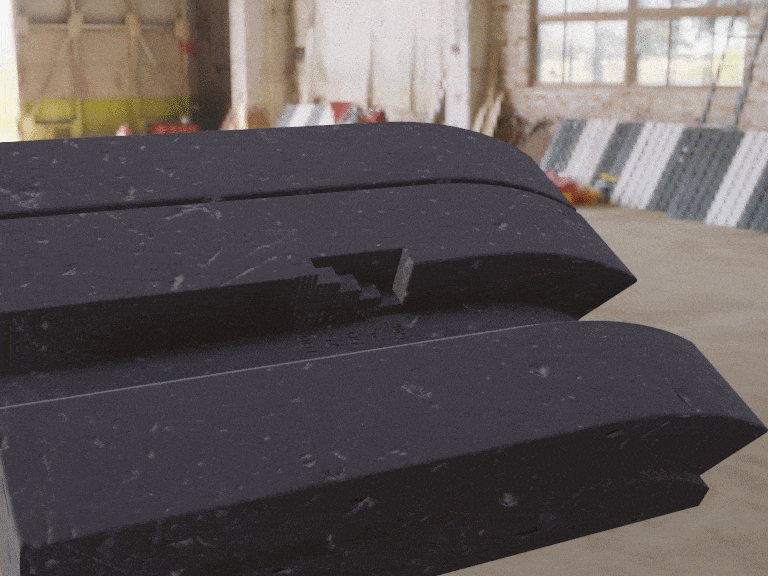
This step is the trickiest because the handling of a specific software is needed beforehand to be able to obtain good results. We aim here to add the visual effects and “compose” the scene : that is to say to arrange the objects at our will. We also need to define the relationship between the objects (if there are more than one) as well as the rotations and translations that are allowed. Blender was used in our example. In this specific case, we had to parameterize the height and width of the object so that it can vary throughout the takes. To do so we used an invisible object that “trimmed” the main one resulting in height changes; This models the evolution of a classic tire wear indicator mark during its lifespan.
Rendering
Last but not least, we need to save (image,label) pairs that will be used to supplement our training dataset.
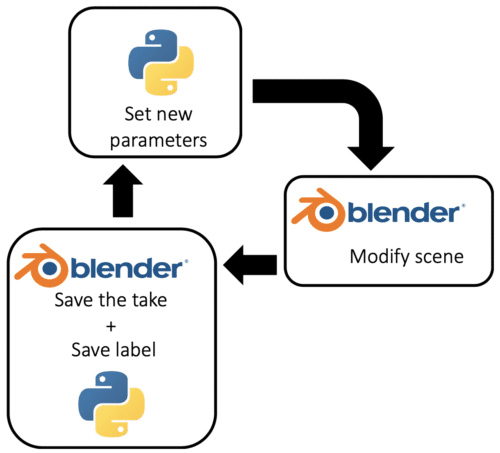
For this step, it is important to have a way to change the scene parameters mentioned before automatically (e.g. with a Python Script). Blender provides a Python API allowing a script to fully control the software. We will use this feature to programmatically change the viewpoint and height of the object across the different renders. Because all the parameters are known at each instant, we are also able to save the localization of the gauge for every image, once again using the Python API.
The only step left is to use those images to train the Deep Learning model !
Good practices
Even if this method can seem like the response to a lot of problems, some pitfalls are to be avoided :
- Even if the images may resemble real ones from a human eye, you have to keep in mind that a lot of work is required to achieve a diversity close to real images. Post treatment might be required as a result. As example, for our project we did some post treatments including style transfer to increase diversity.
- Because the images are taken from a unique 3D model, you might want to ensure that there is no unwanted over-fitting on the scene. In our previous example, the gauge is always located at the same place relatively to the object’s 4 corners : without any precaution, the model might use those corners to infer the location of the gauge. Since those corners are not present on real images, this is a learning error that will lead the model to generalize very badly. We chose to crop the borders randomly to get rid of this problem in our case.
To go further
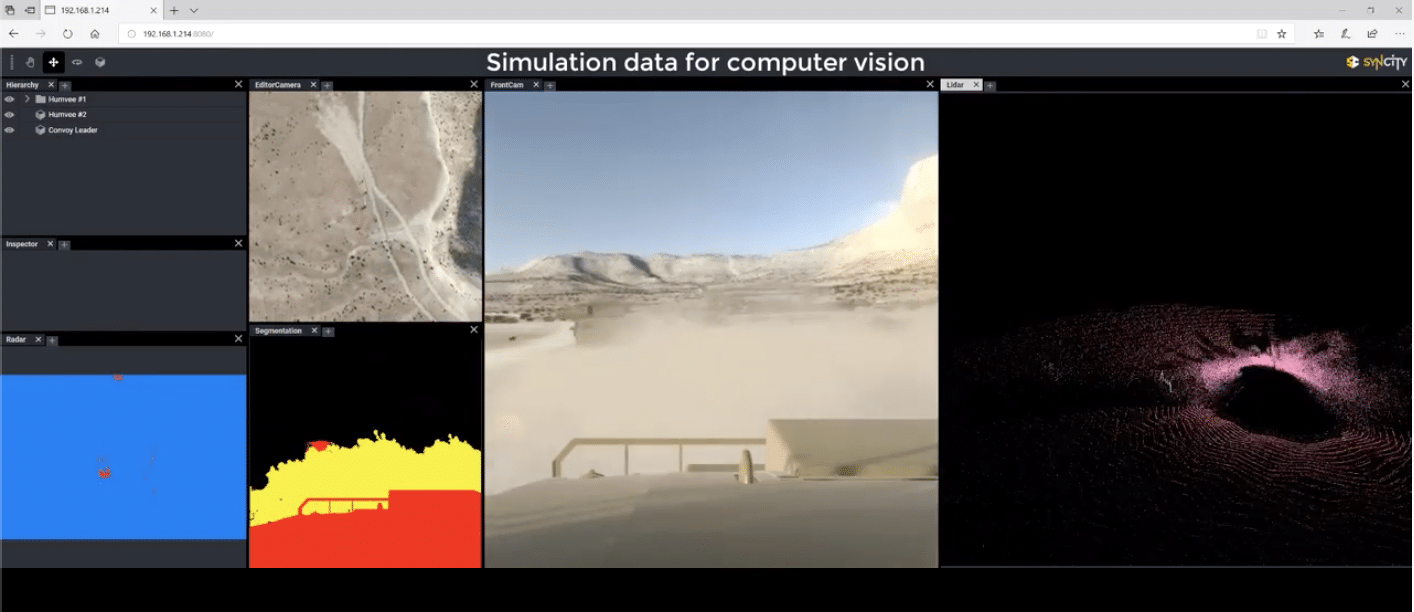
CVEDIA : 3D synthetic environments for AI
CVEDIA used game development technologies to create a 3D synthetic environment specific for AI training and validation. Its typical use case is the testing of sensors from autonomous vehicles in this synthetic space, allowing a safe yet reliable trial of the system. More here : https://www.cvedia.com/syncity/
Synthetic Dataset creation for computation speed up
Speed up computation for NAS approaches by synthesizing a small subset of training data encoding all the diversity of the larger available dataset : https://eng.uber.com/generative-teaching-networks/
(*) GAFAM : Google Amazon Facebook Apple Microsoft.
[1] Blender : Blender is the free and open source 3D creation suite. It supports the entirety of the 3D pipeline—modeling, rigging, animation, simulation, rendering, compositing and motion tracking, even video editing and game creation.
[2] Onshape : A browser based CAD software. It is freely available to create public documents.
